Update: This article was last updated on 31st July 2024 to reflect the accuracy and up-to-date information on the page.
“Mom, why is the sky blue?” “How do birds fly?” If you’ve ever found yourself stumped by the inquisitive mind of a preschooler, you’re not alone. The boundless curiosity these little explorers bring into our lives is nothing short of magical. Yet, as they grow, that spark for science, technology, engineering, and math (STEM) can sometimes flicker.
In a world dominated by STEM-driven advancements, it’s crucial to fan the flames of their early enthusiasm. STEM isn’t just a school subject; it’s the key to unlocking a world of possibilities. As parents and educators, we hold the torch to illuminate their path to discovery.
So, whether you’re a parent searching for the perfect weekend activity or an educator looking to spice up the classroom, we’re listing Top 5 STEM project experiments for kids that will teach your young ones science concepts. These experiments are not complex and are entirely safe for kids.
Recommended Reading: Play And Learn Engineering Educational STEM Games
1. Make An Egg Float In Saltwater

Category: Science
Concept Explained: Density
One of the very first things we learn in Physics is the concept of density. Rather than making them understand by reading, help your child experiment and learn the concept on their own.
Ingredients:
- 1 Egg
- Salt
- Water
- A big transparent drinking glass
Instructions:
- Take a glass and fill it with water till it’s half full
- Put in 6-7 tablespoons of salt and stir nicely
- Slowly and carefully pour in some more water till the glass is almost full
- You have to ensure that salty and plain water do not mix
- Slowly and carefully put the egg into the water and note what happens next
What do you observe?
When the egg is lowered into the water it is observed that it drops through the plain water until it reaches the salty water and starts to float.
The experiment shows that salt water is denser than plain water and thus enables the egg to float at the juncture, i.e, right in the middle of the glass!!
2. The Catapult Project
Category: Engineering/Physics
Concept Explained: Energy conversion, Newton’s Laws of Motion
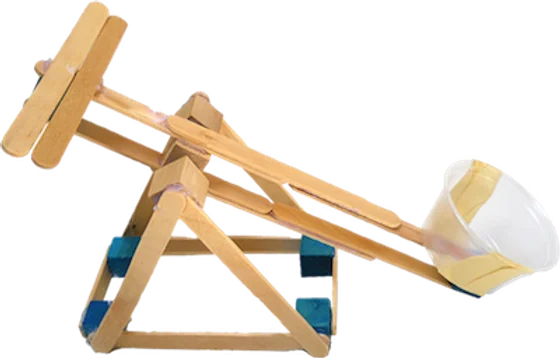
Construct a catapult using popsicle sticks, rubber bands, and common items to explore energy conversion and Newton’s Laws of Motion. Pulling down the lever arm converts potential energy to kinetic energy, launching projectiles and illustrating fundamental physics concepts.
Ingredients:
- Popsicle sticks
- Rubber bands
- Bottle cap (from a milk or gallon jar)
- Hot glue gun
- Tiny objects (paper balls or marshmallows)
- Big straw
- Wood
- Spring
Instructions:
- Stack 5 Popsicle sticks together and wrap a rubber band around each end.
- Stack 2 more Popsicle sticks and wrap a rubber band around one end.
- Slide the stack of 5 sticks between the 2 Popsicle sticks.
- Wrap a rubber band at the meeting juncture to hold the catapult together.
- Attach a bottle cap to the top of the Popsicle stick to hold the projectile.
- Launch the projectile (small ball of paper or marshmallow) by pulling down and releasing the Popsicle stick.
What do you observe?
The catapult demonstrates energy conversion, converting potential energy into kinetic energy as the lever arm is pulled down, launching the projectile. It also provides insights into Newton’s Laws of Motion, illustrating the principles of inertia, motion, and action-reaction.
Recommended Reading: Mastering STEM with LEGO: Creative Coding Projects
3. Build Your Own Telescope

Category: Physics
Concept Explained: Optics, Light refraction
Assemble a DIY telescope with double convex and double concave lenses to delve into optics and light refraction. This project demonstrates how lenses interact to enhance vision, providing a hands-on introduction to basic optics and the science of light.
Ingredients:
- 1 Double convex lens (38 mm diameter, 500 mm focal length)
- 1 Double concave lens (38 mm diameter, 150 mm focal length)
- Cardstock paper (2 pieces)
- Scissors
- Tape
Instructions:
- Roll one piece of cardstock into a tube, aligning the outer edge with the concave lens.
- Roll the second piece to fit inside the first one, sliding it through the open end.
- Use tape to fix the convex lens onto the open end of the second tube.
- Test your telescope by aiming at a distant object through the concave lens.
- Slide the second tube to adjust focus for a clear view.
What do you observe?
The telescope, consisting of a concave lens (diverging lens) and a convex lens, allows you to see distant objects. Light passing through the lenses bends, making far objects appear closer and larger.
4. Cloud in a Jar
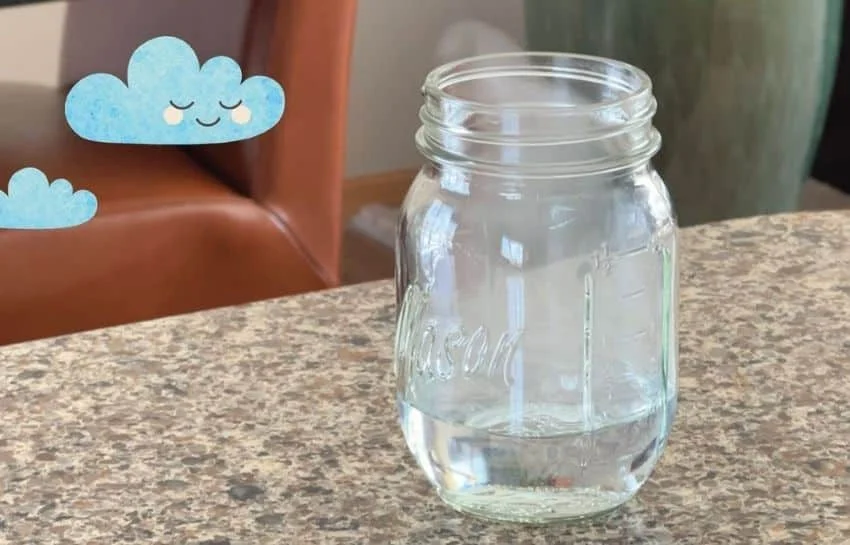
Category: Science
Experience cloud formation magic with a simple water and hairspray experiment. Suitable for all ages, this hands-on activity explores the water cycle. Scale it up for older kids with advanced methods.
Ingredients:
- Water
- Hairspray
Instructions:
- Take a clear glass jar and fill it with water until it’s about three-quarters full.
- Spritz a quick burst of hairspray into the jar. This simulates particles in the air that water vapor can cling to.
- Cover the top of the jar with a lid or a plate.
- Place a few ice cubes on top of the lid to cool the air inside the jar.
What do you observe?
As the air inside the jar cools, water vapor condenses around the hairspray particles, forming a visible cloud. This mimics the natural process of cloud formation in the atmosphere.
5. Magnetic Slime

Category: Science
Concept Explained: Magnetism
Elevate the classic slime activity with iron oxide powder and magnets. While achieving the right consistency can be a challenge, the result is fascinating magnetic slime. A great conversation starter, this project sparks questions about magnetism.
Ingredients:
- Glue
- Liquid starch
- Iron oxide powder
- Strong neodymium magnet(s)
Instructions:
- In a bowl, mix glue and a moderate amount of iron oxide powder. Stir thoroughly.
- Slowly add liquid starch to the mixture while stirring continuously. Continue until the slime reaches the desired consistency.
- Knead the slime with your hands to ensure it’s well-mixed and reaches the right texture.
- Place the magnetic slime on a flat surface.
- Introduce the neodymium magnet(s) and observe how the slime reacts to the magnetic field.
What do you observe?
The slime, infused with iron oxide, exhibits magnetic properties and reacts to the presence of the neodymium magnet(s). This interaction provides a tangible way for kids to explore and understand basic principles of magnetism.
Recommended reading: Awesome Scholarships for Women in STEM
Moonpreneur is on a mission to disrupt traditional education and future-proof the next generation with holistic learning solutions. Its Innovator Program is building tomorrow’s workforce by training students in AI/ML, Robotics, Coding, IoT, and Apps, enabling entrepreneurship through experiential learning.


