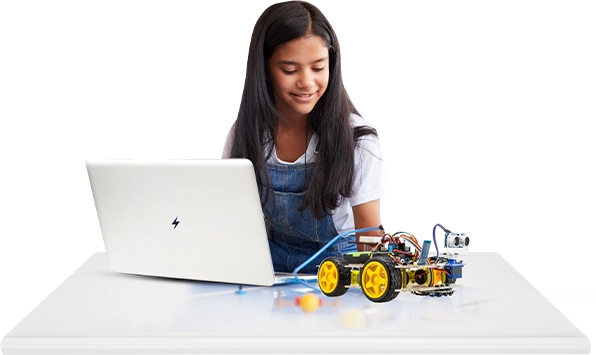
Ever wish you could build your robot? It’s easier than you might think. Robotics DIY Projects enables you to create yourself regardless of the fact that you are either just starting to code or are already quite the expert. This blog will demonstrate how to create all types of robots: from those which can easily follow a line to more intricate ones. So, roll up your sleeves and get ready for the toolbox-and let’s get building something cool!
If you are a beginner or just a Robotics enthusiast, do watch this video till the end because Moonpreneur is here with some interesting and fun DIY Robotics projects you can build at home.
Similar Read: Robotics projects ideas for kids in 2026
| DIY Robotics Projects | Difficulty | Age Group |
|---|---|---|
| Robotic Hand with Straws | Easy | Kids of all ages |
| Automatic Garden Waterer | Moderate | Teens and above |
| Automated Grass-Cutting Robot | Difficult | Teens and above |
| Homemade Voice-Controlled Waiter Robot | Moderate | Teens and above |
| Moonpreneur’s Traffic Light Kit | Easy | Kids of all ages |
| Line-Following Robot | Intermediate | Kids of all ages |
| Obstacle-Avoiding Robot | Intermediate | Kids of all ages |
| Solar-Powered Robot Car | Beginner | Kids of all ages |
| Gesture-Controlled Robot | Advanced | Teens and above |
| Bluetooth-Controlled Robotic Arm | Advanced | Teens and above |
Project 1: Robotic Hand with Straws
- Difficulty: Easy
- Age Group: 8+
- Description: Build a robotic hand using simple materials like straws and string. This project is a fun and engaging way to learn about basic robotics concepts while fostering creativity.
Materials Needed:
- Straws
- String
- Scissors
- Needle
- Cardboard tube
Procedure:
- Cut Notches: Carefully cut notches in the straws to create joints for the fingers. Experiment with different depths for flexibility.
- Add Finger Joints: Cut additional notches to add joints to the fingers. Consider the number of fingers needed to grasp objects.
- Thread Strings: Tie strings to a needle and poke holes above the topmost joint in each straw finger. Thread the strings through the holes.
- Build Structure: Use the cardboard tube as a supporting structure. Attach the straws to the top of the tube.
- Test: Pull the strings to make the fingers bend and release. Adjust as needed.
- Customize: Get creative with the design and materials. Consider using eco-friendly straws for a more sustainable option.
Project 2: Automatic Garden Waterer
- Difficulty: Intermediate
- Age Group: 12+
- Description: Create an automatic garden waterer using Arduino technology and a servomotor. This project combines electronics and gardening for a practical and educational experience.
Materials Needed:
- Arduino Nano
- Servo motor
- RTC (Real-Time Clock)
- Electrical wire
- Bolts and nuts (M3 X 10)
- End connector
- Inline valve
- 3D printed components
- Mini breadboard
- Jumper wires
Procedure:
- Assemble Circuit: Connect the components according to the circuit diagram. Ensure proper connections between the Arduino Nano, servomotor, and RTC.
- Program Arduino: Write the code to control the servo motor’s opening and closing of the valve at specified times.
- Attach Valve: Connect the servomotor to the inline valve to regulate water flow.
- Power Up: Use a USB port to power the system. Test the watering mechanism and adjust settings as needed.
Project 3: Homemade Voice-Controller Waiter Robot
- Difficulty: Advanced
- Age Group: 15+
- Description: Construct a voice-controlled waiter robot using Arduino and Bluetooth technology. This project involves complex electronics and mechanical assembly, suitable for experienced robotics enthusiasts.
Materials Needed
- Arduino Uno
- HC05 Bluetooth Module
- Motor driver
- Wheels
- Gear motors
- Batteries (3.7v)
- Battery holder
- LEDs
- Jumper wires
- Sunboard sheet
Procedure:
- Assemble Components: Attach the gear motors to the chassis and connect them to the motor driver. Install the Bluetooth module and LEDs.
- Wire Connections: Connect the Arduino Uno to the motor driver, Bluetooth module, and LEDs using jumper wires.
- Upload Code: Write and upload the code to the Arduino Uno to enable voice control functionality.
- Test: Pair the Bluetooth module with a smartphone and test voice commands to control the robot’s movements.
- Fine-tune: Adjust motor speeds and response to voice commands for optimal performance.
Similar Read: How To Plan The Perfect Opposite Day Party
Project 4: Automated Grass-Cutting Robot
- Difficulty: Advanced
- Age Group: 15+
- Description: Build an autonomous grass-cutting robot using Arduino and various components. This project requires advanced electronics and mechanical skills, making it suitable for experienced hobbyists.
Materials Needed:
- Arduino Uno board
- L293D motor drivers
- Ultrasonic sensor
- Ultrasonic sensor holder
- DC gear motor
- BLDC motor
- Electronic stability controller
- X-type cross holder
- SG-90 servo motor
- Servo motor tester
- Robot chassis and wheels
Procedure:
- Assemble Chassis: Attach the motors, wheels, and other mechanical components to the robot chassis according to the design diagram.
- Connect Electronics: Wire the Arduino Uno to the motor drivers, ultrasonic sensor, and servo motor using appropriate connections.
- Program Arduino: Write and upload code to the Arduino Uno to control the robot’s movements, obstacle detection, and grass-cutting functionality.
- Test and Calibrate: Test the robot in a controlled environment to ensure proper operation. Adjust motor speeds and sensor sensitivity as needed for optimal performance.
- Field Test: Conduct outdoor field tests to evaluate the robot’s ability to navigate and cut grass autonomously. Make adjustments based on real-world conditions.
Project 5: Moonpreneur’s Traffic Light Kit
- Difficulty: Beginner
- Age Group: 10+
- Description: Assemble a traffic light kit using Arduino technology. This beginner-friendly project introduces basic electronics and coding concepts practically and engagingly.
Materials Needed:
- Arduino Nano-compatible board
- MoonCard controller board
- Traffic light board with LEDs
- Breadboard
- Jumper wires
- USB cable
Procedure:
- Prepare Components: Gather the Arduino Nano-compatible board, MoonCard controller board, and traffic light board with LEDs.
- Insert Boards: Insert the Arduino Nano-compatible board into the MoonCard controller board, as indicated. Align the connectors and pins properly.
- Connect Wires: Use jumper wires to connect the traffic light board to the MoonCard controller board. Match the wire colors to the corresponding pins on both boards.
- Power Up: Insert the USB cable into a USB power adapter or computer. Connect the other end to the Arduino Nano-compatible board to power the traffic light kit.
- Test Operation: Upload the provided code to the Arduino Nano-compatible board and observe the traffic light LEDs. Ensure proper functioning of the traffic light sequence (red, yellow, green). Adjust code or connections as needed for desired behavior.
Project 6: Line-Following Robot
- Difficulty: Intermediate
- Age Group: 12+
- Description: Build a robot that follows a black line on a white surface using infrared (IR) sensors. This project introduces basic robotics, sensor applications, and motor control concepts.
Materials Needed:
- Arduino Uno
- IR sensors (2 or more)
- L298N motor driver module
- DC motors with wheels
- Robot chassis
- Breadboard
- Jumper wires
- Batteries (9V) and battery holder
Procedure:
- Build the Chassis: Assemble the robot chassis and attach the DC motors with wheels.
- Connect the Electronics: Wire the IR sensors, motors, and L298N motor driver to the Arduino Uno.
- Upload the Code: Write and upload code to make the robot move along the black line. Use IR sensor input to adjust motor speed and direction.
- Test and Adjust: Place the robot on a test track and fine-tune sensor placement and code to optimize line detection.
- Expand Functionality: Add an LED indicator to light up when the robot detects the line.
Project 7: Obstacle-Avoiding Robot
- Difficulty: Intermediate
- Age Group: 12+
- Description: Create a robot that uses ultrasonic sensors to detect and avoid obstacles in its path. This project is ideal for learning about autonomous movement and sensors.
Materials Needed:
- Arduino Uno
- Ultrasonic sensor (HC-SR04)
- Servo motor (for sensor rotation)
- L298N motor driver
- DC motors and wheels
- Robot chassis
- Breadboard
- Jumper wires
- Batteries (9V)
Procedure:
- Assemble the Robot: Attach the DC motors and wheels to the chassis. Place the servo motor and mount the ultrasonic sensor on it.
- Circuit Connections: Connect the ultrasonic sensor, motors, and motor driver to the Arduino Uno.
- Write Code: Program the Arduino to read ultrasonic sensor data. Adjust motor movement to turn away when detecting an obstacle.
- Test Movement: Place the robot in an environment with obstacles and ensure it stops or changes direction upon detection.
- Enhance Design: Attach a buzzer to alert when an obstacle is detected.
Project 8: Solar-Powered Robot Car
- Difficulty: Beginner
- Age Group: 10+
- Description: Build an eco-friendly, solar-powered robot car. This project introduces students to renewable energy concepts while integrating robotics.
Materials Needed:
- Small solar panel (6V)
- DC motors with wheels
- Robot chassis
- Motor driver module
- Arduino Uno (optional for advanced features)
- Jumper wires
- Breadboard
- Battery holder (backup power)
Procedure:
- Mount the Solar Panel: Attach the solar panel to the top of the robot chassis.
- Connect Motors: Wire the DC motors to the motor driver module, allowing them to receive power from the solar panel.
- Test Movement: Place the robot under direct sunlight and observe its motion. Adjust wiring or panel positioning for better efficiency.
- Enhance (Optional): Integrate Arduino for adding additional functions like LED lights or a solar-powered fan.
- Experiment: Compare performance in sunlight versus artificial light sources.
Project 9: Gesture-Controlled Robot
- Difficulty: Advanced
- Age Group: 15+
- Description: Create a robot controlled by hand gestures using an accelerometer sensor. This project combines electronics, programming, and robotics for an engaging learning experience.
Materials Needed:
- Arduino Uno
- Accelerometer sensor (ADXL335 or MPU6050)
- RF transmitter and receiver module
- L298N motor driver
- DC motors with wheels
- Robot chassis
- Breadboard and jumper wires
- Rechargeable batteries
Procedure:
- Set Up Gesture Control: Connect the accelerometer to an Arduino and calibrate it to detect hand gestures (e.g., tilting left/right for movement).
- Integrate RF Module: Use the transmitter to send data to the robot’s receiver module.
- Wire the Motors: Connect the motors and motor driver to the receiving Arduino to control movement.
- Test Gestures: Program the Arduino to interpret gestures and translate them into motor commands.
- Optimize: Fine-tune the sensitivity of gestures for smooth control.
Project 10: Bluetooth-Controlled Robotic Arm
- Difficulty: Advanced
- Age Group: 15+
- Description: Build a robotic arm that can be controlled wirelessly via a smartphone using Bluetooth technology. This project explores advanced mechanical movements and control systems.
Materials Needed:
- Arduino Uno
- Servo motors (4-6 for arm joints)
- HC05 Bluetooth module
- Smartphone (with Bluetooth app)
- Robot arm kit (or DIY using wooden pieces)
- Jumper wires
- Power source
Procedure:
- Assemble the Robotic Arm: Build the robotic arm using a pre-made kit or craft it with wooden parts. Attach servo motors to each joint.
- Connect Electronics: Wire the servos to the Arduino Uno and connect the Bluetooth module.
- Write Code: Program the Arduino to receive commands via Bluetooth and move the servos accordingly.
- Test Smartphone Control: Use a Bluetooth controller app on your smartphone to send movement commands.
- Enhance: Add a gripper to pick and place objects. Experiment with different arm movements for tasks.
Want to make your child future-ready with Robotics? Moonpreneur offers a tailor-made program. Reserve a spot in our free 60-minute workshop today and introduce them to the amazing world of robotics and innovations!


