
Moonpreneur
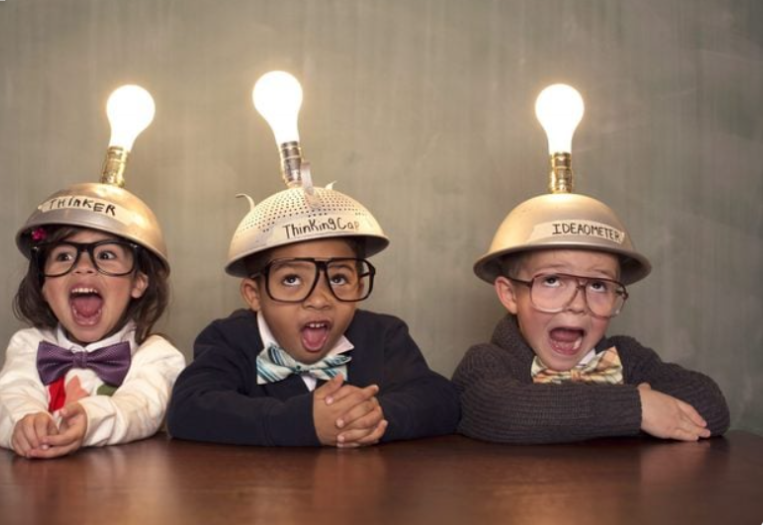
Image Source: https://www.rd.com/
Update: This article was last updated by Moonpreneur on 8th January 2026 to reflect the accuracy and up-to-date information on the page.
Inventions! When we think of invention, the likes of Edison or Graham Bell crosses our mind. But, an invention is simply the product of our creative mind, and it can begin with simple do-it-yourself (DIY) activities. Therefore, we must create opportunities for them to express their creativity. With the right guidance, every child has the potential to become a budding innovator.
Moonpreneur brings 10 exciting invention ideas that your child can explore for school projects. These projects not only foster skill development but also encourage students to discover their strengths. The ideas are divided into four categories.
Recommended reading: Top 7 Innovative Ideas for Fun Learning for Kids
| Physics Projects |
|---|
| Car Powered by Balloon |
| Egg Lander Capsule |
| Engineering Projects |
|---|
| Smartphone Projector |
| Castle Lantern |
| Paper Roll Kaleidoscope |
| Duct-tape purse |
| Stethoscope |
| Chemistry Projects |
|---|
| Clear Bottle Ocean |
| Fruit-LED lights |
| Water-Glass Xylophone |
Category 1: Physics Projects
1. Car Powered by Balloon
Kids will love this experiment irrespective of their age. It is a fantastic way to learn about air pressure and kinetic energy.
List of things required for this experiment:
- Plastic Bottle
- Screw Driver
- Wooden stick
- Buttons
- Rubber pipe
- Balloon
- Duct tape
Steps to follow:
- Make a car out of cardboard. Ensure that the skewers protrude from the sides by at least a quarter inch to serve as wheel axles.
- Cut two straws in half to use them as wheel axles and securely attach them to the bottom of the cardboard template.
- Create holes in the bottle tops using a nail.
- Insert a skewer into each straw and then attach the wheels to them.
- Use a rubber band to fasten the balloon’s mouth to the narrow end of the straw.
- Allow the balloon to ride on the cardboard vehicle by placing the straw down the middle.
- Inflate the balloon by blowing air through the open end of the straw, position the vehicle on the ground, and push it forward.
Fun Fact And Trivia: The concept of using air pressure to power vehicles is similar to how rockets work in space exploration.
Recommended reading: Top 21 Robotics Projects Ideas For Kids
2. Egg Lander Capsule
The project aims to design a mechanism that prevents an egg from breaking when dropped from a height. This project explains the pull of gravity and terminal velocity to children
List of things required for this experiment:
- Egg
- Construction Paper
- Balloon
- Duct Tape
Steps to follow:
- Draw a Nasa pattern on construction paper, cut it out, and fold it along the line.
- Fold the pyramid shape paper capsule, put a raw egg inside it, and tape it close.
- Attach four blown balloons to the pyramid, and the lander is ready to launch.
Fun Fact And Trivia: The first successful human moon landing was achieved by NASA’s Apollo 11 mission in 1969, with astronauts Neil Armstrong and Buzz Aldrin.
Recommended reading: Ways Moonpreneur Will Teach Children About Entrepreneurship
Category 2: Engineering Projects:
3. Smartphone Projector
This DIY project can be made with everyday objects and a smartphone. Kids will learn about light and optics while watching their favorite movies on a large screen.
List of things required for this experiment:
- Shoe Box
- Magnifying Glass
- Cutter
- Masking Tape
- Foam Board
- Smartphone
- Hot Glue gun
- Ruler
Steps to follow:
- Cut a shoebox lid so that the top is always open, and slide a phone inside.
- Make a circular cut at one end of the box, slightly larger in diameter than the required lens.
- Secure the lens inside the hole with clear tape.
- Cut a small rectangle from the box lid to fit inside.
- Create three alternating folds in this piece to form an “M” shape, creating a base for the phone.
- Mount the phone on the base inside the cardboard box, with the display facing the lens.
- Play a video on the phone, close the curtains, and point the projector at a blank wall.
- Adjust the distance between the phone and the lens to achieve a clear movie screen projection on the wall.
Fun Fact And Trivia: The first projector was invented by Thomas Edison in the late 19th century. It used a film reel to project moving images.
Recommended reading: Measuring Innovation And Trends In Learning
4. Castle Lantern
This project is one of the most exciting of all, as it can be used to decorate the
school’s exhibition room! The project teaches application of modern optical projection system theory and allows children to show their creativity and enjoy a sense of achievement upon completion.
List of things required for this experiment:
- Aluminum Foil
- Plastic Bottle
- Hot Glue Gun
- Paper Clay
Steps to follow:
- Draw a castle on the cardboard sheet, color it, and cut out the windows and doors.
- Use butter paper to fill the window-shaped space.
- Fold the sketch into a castle 3D model with four creases.
- Fold and glue the castle sides.
- Place a few LED votives inside.
Fun Fact And Trivia: The earliest known use of lanterns dates back to ancient China, where they were initially made from hollowed-out gourds.
5. Paper Roll Kaleidoscope
The paper roll kaleidoscope is a fascinating and visually appealing project that allows children to create colorful and intricate patterns.
List of things required for this experiment:
- White and black thick paper
- Empty paper towel rolls
- Aluminum foil
- Colored paper
- Transparent plastic cover
- Tracing paper
- Adhesive tape
- Decorative material
- Glue
- Scissors
Steps to follow:
- Draw a circular outline on the cardboard roll using paper to determine the dimensions of the solid triangle (prism).
- Draw a perfect triangle inside the core.
- Create a rigid, mirror-like sheet by attaching reflective papers to a flat piece of cardboard.
- Use the side lengths of the triangle to draw a rectangle on the reflective sheet, with a breadth of three times the side length.
- Divide the width of the rectangle into three segments and mark them with two parallel lines.
- Fold the mirror-like sheet into a prism, with the reflective surface on the inside, using the marked lines as creases.
- Insert the prism into the cardboard roll and cover one side with a reflective sheet secured with tape.
- Add decorative materials inside the prism and cover the open end with a transparent film.
Fun Fact And Trivia: The word “kaleidoscope” comes from Greek words meaning “beautiful form to see.”
Fun Fact And Trivia: The word “kaleidoscope” comes from Greek words meaning “beautiful form to see.”
6. Duct-tape purse
The duct-tape purse is a fun and easy DIY project to create stylish and practical purse. It is both easy and interesting..
List of things required for this experiment:
- Duct tape
- Scissor
- Ruler
- Copper wire
- Calculator (optional)
Steps to follow:
- Fold the duct tape sheet in half and seal both open sides of the edge with tape to create a pouch.
- Take another piece of duct tape and make a strap.
- Attach the strap to the open end of the pouch, and your purse is ready.
Fun Fact And Trivia: Duct tape was originally invented during World War II to seal ammunition cases.
7. Stethoscope
Learn how to make a stethoscope with this DIY project! With just a few materials, you can build a functional stethoscope.
List of things required for this experiment:
- Funnel
- Pipe
- Y-tube
- Balloon
Steps to follow:
- Attach one funnel to the smaller end of the cardboard tube, and insert it into the second funnel.
- Open up a funnel and drape the balloon over its opening, fixing it with tape.
- Decorate the stethoscope.
Fun Fact And Trivia: The stethoscope was invented by French physician René Laennec in the early 19th century. The first stethoscope was a wooden tube.
Category 3: Chemistry Projects
8. Clear Bottle Ocean
This fun school project is an excellent way to enhance a child’s problem-solving skills, creativity, and innovative mindset.
List of things required for this experiment:
- Glass Bottle
- Cooking oil
- Water
- Pecan
- Food coloring
Steps to follow:
- Take a clear bottle. Fill half of it with water.
- Add food coloring to the water and stir.
- Mineral oil should fill the rest of the bottle.
- Put ocean sand, seashells, and plastic underwater animals into the bottle.
- Close the cap and shake. After settling, your kid will have their ocean in the bottle!
Fun Fact And Trivia: The Great Barrier Reef, located off the coast of Australia, is the world’s largest coral reef system.
9. Fruit-LED lights
Fruit-LED lights are a unique and innovative way to power small electronic devices, such as LED light bulbs, using fruits as a source of electricity. This power generation method is based on the principle of electrolysis, which involves breaking down the chemical compounds in fruits to release electrically charged ions.
List of things required for this experiment:
- 4-5 Lemons
- Zinc covered Nails
- Alligator Clips
- Copper wire
- Calculator (optional)
Steps to follow:
- Stick a Nail (negative) on one side and wire (positive) on the other side of the lemon.
- Arrange them in a copper-to-zinc pattern to connect the alligator clips.
- Now you are ready to light the LED.
- Fasten the copper-sided alligator clip to the longer positive and the zinc-sided clip to the shorter negative end of the LED. And there you go!
Pro Tip:
- Use sandpaper to clean nails and wire to improve conductivity.
- If your light is dim, use fresh lemon for bright light.
Fun Fact And Trivia: The first practical light bulb was invented by Thomas Edison in 1879.
Category 4: Music Project
10. Water-Glass Xylophone
This simple water-glass xylophone project can boost your child’s musical creativity. They can try different bottles and wooden spoons in this experiment, to discover new sounds.
List of things required for this experiment:
- 6 Pcs Glasses
- Spoon
- Water
- Food Colouring (optional)
Steps to follow:
- Line up 6-8 bottles on a table and fill them with water in increasing amounts.
- To make each bottle unique, add a drop of food coloring.
- Tap the bottles’ mouths with the spoon to hear them ring.
- Fine-tune the bottles by adding or removing water.
- Try different bottles and wooden spoons for playing.
Fun Fact And Trivia: The xylophone is considered one of the oldest musical instruments, with origins dating back to ancient Asia and Africa.
Conclusion
Encouraging invention at a young age can lead to a new generation of inventors who challenge boundaries and make significant contributions to society. We hope this list of school project ideas comes in handy in fostering creativity, critical thinking, and problem-solving skills in your child.
Recommended Reading:
- 6 Robotics Project Ideas for High School Students in 2023
- Top 5 Math Project Ideas for Kids
- Top 10 Arduino Projects for Kids in 2023
Moonpreneur is on a mission to disrupt traditional education and future-proof the next generation with holistic learning solutions. Its Innovator Program is building tomorrow’s workforce by training students in AI/ML, Robotics, Coding, IoT, and Apps, enabling entrepreneurship through experiential learning.











As an advocate of active learning, I firmly believe that encouraging students to engage in creative and innovative activities can have a profound impact on their educational journey.
What a great blog post! My imagination has been genuinely awoke by your research of the Castle Lantern, and I’ve been flown away to a land of magic. The Castle Lantern is an ingenious creation that not only functions as a gorgeous ornamental item but also narrates historical tales in an intriguing and original way.
It’s amazing how you proposed using smartphone projectors for art displays and garden movie nights. It emphasizes the device’s adaptability and entertainment potential. It creates a world of opportunities for people to watch their preferred films or television programmed on a bigger screen without the need for a TV or pricey equipment.
You missed the Smart shoe invention. This great Assam boy has left me amazed, It reaffirms why India holds a special place in my heart. Incredible innovation!
Can you share some more information to make a Duct-tape purse even more creative and unique, as I can’t wait to try it out!
You can experiment with different colors, patterns and you can also add embellishments like buttons or beads for uniqueness.
Is there any age limit for Egg Lander Capsule project
No specific age, but it is generally more suitable for students in middle school or high school due to the level of complexity involved in it.
Which science theory is used in the ‘Car Powered by Balloon’ project? What role does each component, such as the plastic bottle and balloon, play in the functionality of the car?
The ‘Car Powered by Balloon’ project showcases air pressure’s forceful release and conversion to kinetic energy, propelling the car forward. The plastic bottle serves as the car’s body, while the balloon, when inflated and released, harnesses air pressure to drive the car’s movement. This demonstrates the interplay between potential and kinetic energy.
How does the ‘Smartphone Projector’ utilize optics and light to create a larger viewing experience?
The Smartphone Projector employs optics by using a magnifying glass to focus and enlarge the image from the smartphone screen. Light passing through the magnifying glass converges to create a larger, more vivid projection on a flat surface. This simple yet effective optical setup enhances the viewing experience.