Arduino DIY project kits make it easy for children to create amazing inventions at home without any coding knowledge. So if you’re looking for some educational activities for your child, here are our top five Arduino DIY project ideas that will help your kid learn about circuits, engineering, programming, problem-solving, and more!
To help you build these projects and keep you excited about Arduino, Moonpeneur is offering a Free Arduino Uno kit. Watch the video to learn how to grab this kit for free!
Directly Jump to Project:
Do you know where automatic water-filling machines are mostly used? It is widely used in the beverage and soft drink industries. Do you know you can make it at home? It’s very simple.
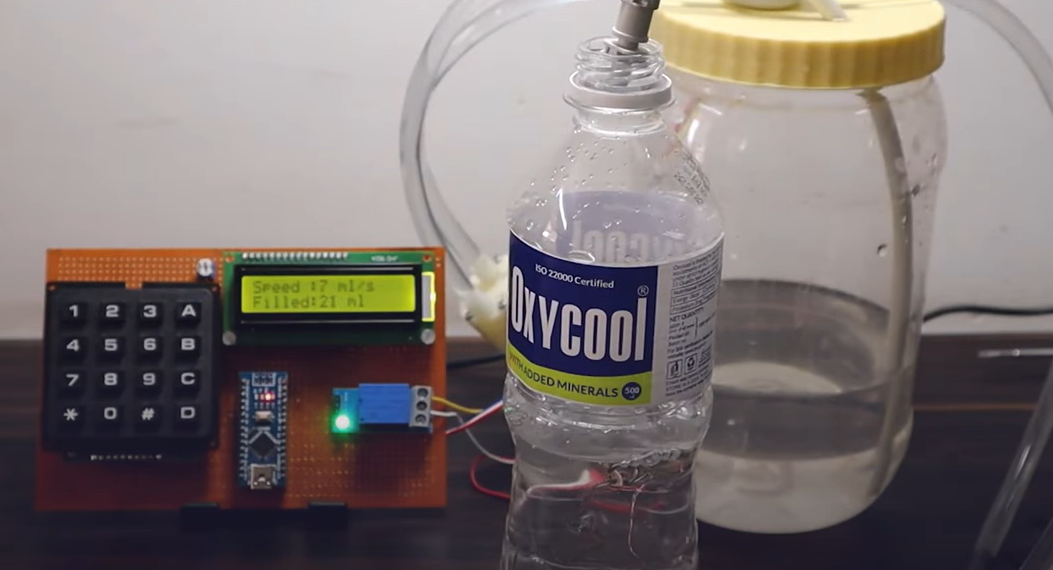
To build this project, we need the following components first; we need an Arduino nano microcontroller port. Then we need a 16X2 LCD display, a 10K potentiometer, then a 4X4 keypad matrix. A haul effect water flow sensor measures liquid flow speed, and a DC water pump draws water from a liquid source.
A 5 Volt single channel relay module. A zero PCB port for assembling all the components together. This is the schematic of the project designed using the Fridge Ink software. The circuit contains an Arduino nano board, water flow sensor, relay module, water pump, and LCD display. Once input is given, the pump starts working and transfers the precise liquid into a container.
During its operation, the LCD displays the speed of water flow and the amount of water in the container. Using this data, it becomes easier to monitor the operation. So, with this method, you can now accurately transfer liquids as well.
If you want to decorate your house with LEDs, this project is very important.
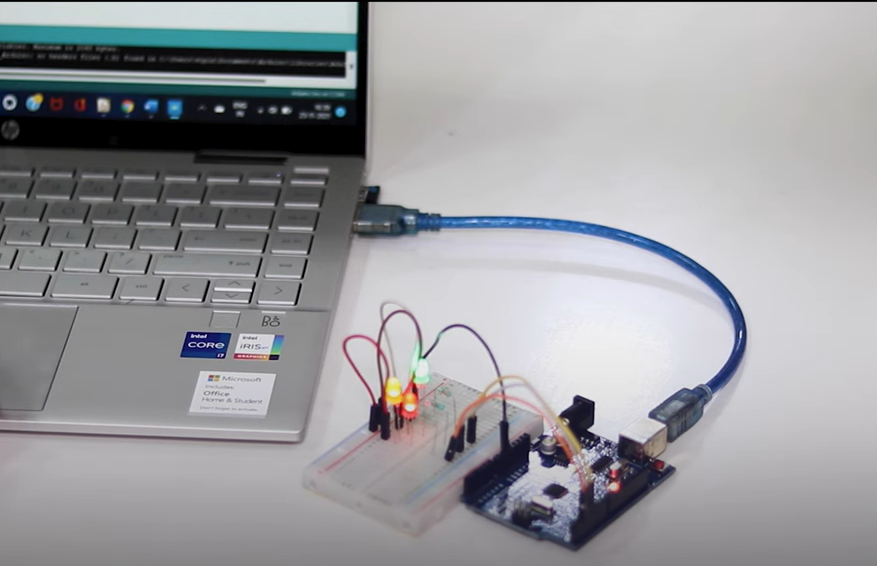
Now suppose you want to blink an external LED with the help of an Arduino, then we will use a breadboard with connection wires and resistors. To interface with the Arduino board, we will connect the positive terminal of the d13 pin.
With a series resistor of 330 ohms Arduino to ground the Arduino Uno and the negative terminal, the company also manufactures the supporting software known as Arduino IDE this is the primary binding factor that makes all Arduino work the way Arduino does is the brain, where the code is installed.
You can download it from the link in the description; it is as simple as subscribing to a channel. This software has a lot of predefined codes installed, with the help of which we are going to blink the LED today.
Now to take LED blinking to the next level, try the 3rd project on this list – NRF Transmitter using an Arduino.

Wireless technology is gradually improving the way devices communicate. This simple project shows how everyday items can be controlled wirelessly. We can use a wireless transmitter to create simple circuits to control LED lights, DC motors, or other components.
We can also use a receiver circuit to reduce the number of wires at the receiving end. The transmitter-receiver modules work in synchronization and precisely follow each command. And doesn’t using a PCB to form a compact circuit at both ends give the whole project an attractive look, doesn’t it?
If you want to learn how traffic lights work, our number 2 project – Moonpreneur’s TRAFFIC LIGHT KIT, will help you create one.

We will start with the Controller Board, which is an Arduino nano-compatible board, and the Moon Card Controller Board has software that will control traffic.
Insert the controller board into the light Moon Card as indicated. Match the drawing in the Moon Card, aligning the connectors and the PINs; otherwise, it will not work. Insert the combination of the controller board and moon cards in the breadboard as shown.
The connector for the controller board should be on the edge of the breadboard, and the pins are also aligned. This will help us extend the connection to the traffic light board, which we will do in the next stage. Next, we will take the traffic light board and will find out its four connecting pins. We will have to connect these four pins to the Controller Board, which we assembled in the previous step, with the help of the wires provided. But before that, connect the traffic LED board to the breadboard.
Next, we will connect the wires. The black wire will go into the GND of the traffic light board and the black of the controller board. The Green wire in the G of the traffic light board and the green of the controller board. In the same way, the yellow wire will go into the Y of the traffic light board and the yellow of the control board. The red wire will go into the R of the traffic light board and the red of the Controller Board.
Finally, we will insert the USB cable into a USB power adapter.
We can also use the USB port of a laptop or computer. The USB cable provides electricity to the board, and there you go – your traffic light is working.
Have you ever wanted to build your own Arduino robot and program it to do cool things? Introducing Lucy, the obstacle-avoiding Arduino robot! Lucy is the number one Arduino project on our list!
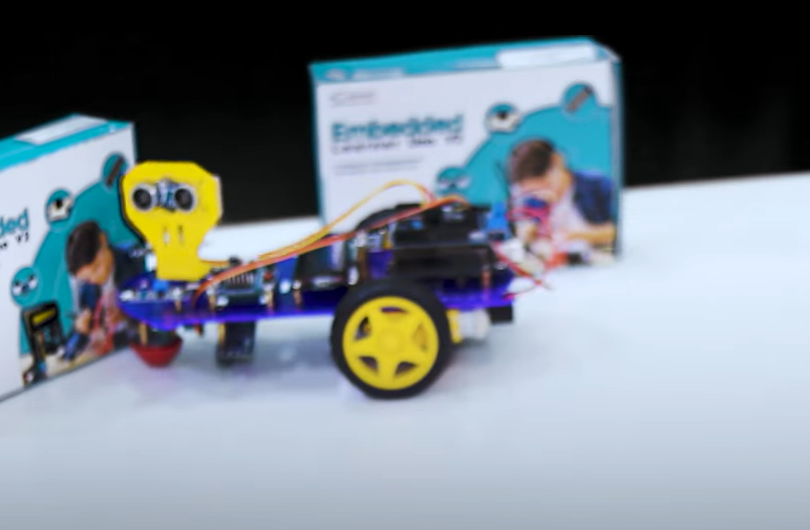
Lucy is not your ordinary Arduino project. It is a robot that is equipped with advanced sensors that allow it to detect objects and avoid obstacles in its path. And the best part?
You can program Lucy to do just about anything you want by simply putting the code in the Arduino! And the more you play with Lucy, the more you’ll learn about coding and robotics. Who knows, you might even become a robotics engineer someday and make even better robots than Boston Dynamics!
Moonpreneur understands the needs and demands this rapidly changing technological world is bringing with it for our kids. Thus we are on a mission to educate and ignite the flames of entrepreneurship through our holistically created online STEM programs, which will help kids master the futuristic sciences such as Robotics, Game Development, App Development, Advanced Math, and much more!!
Register for a free 60-minute Robotics Workshop today!