List of Arduino UNO Related Errors in Windows and Possible Solutions
Steps to upload a program to Arduino UNO board through a Windows PC:- In order to upload a program to an Arduino UNO board using a Windows PC involves
- Connecting UNO with PC using a USB cable.
- Selection of the correct board and port in the Tools menu.
- Uploading the program using the upload button in Arduino IDE after successful compilation.
Arduino UNO board(SMD/DIP)
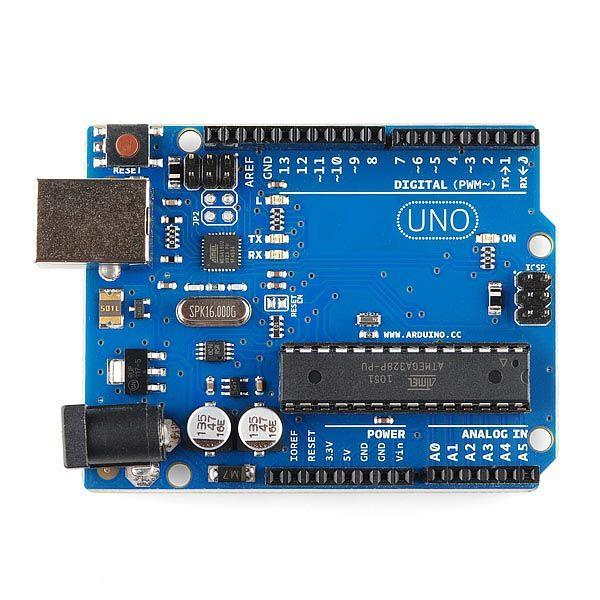
Arduino Uno DIP
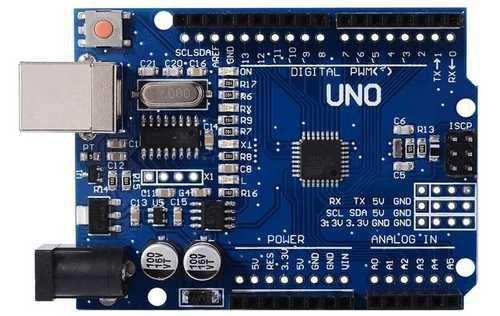
Arduino UNO SMD
First, we will discuss the problems related to the DIP board.
Problem with uploading programs to Arduino board:-
There are multiple pieces involved to upload a program onto an Arduino board and if any of them aren’t right, the upload can fail.
Following are some possible solutions: –
1. Arduino Software
- One possible reason could be that the right Arduino board is not selected in Arduino IDE. To check this, in your Arduino IDE, go to Tools > Board menu and select Arduino UNO.
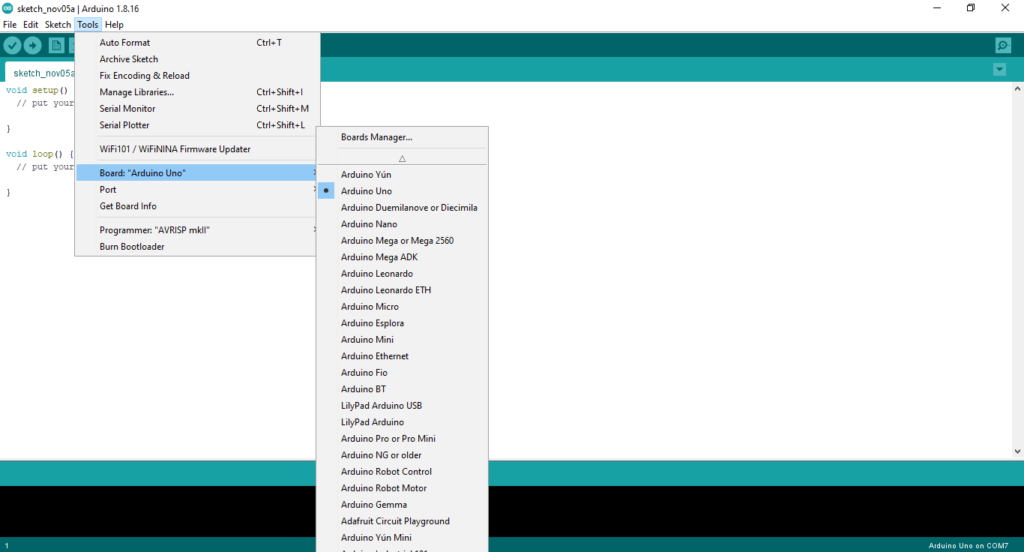
- Check if the correct port is selected by navigating to Tools > Port menu (if your port doesn’t appear, try restarting the IDE with the board connected to the computer), then select the port which has Arduino UNO written with it. If you don’t seem to have a serial port for your Arduino board, see the following information about drivers.
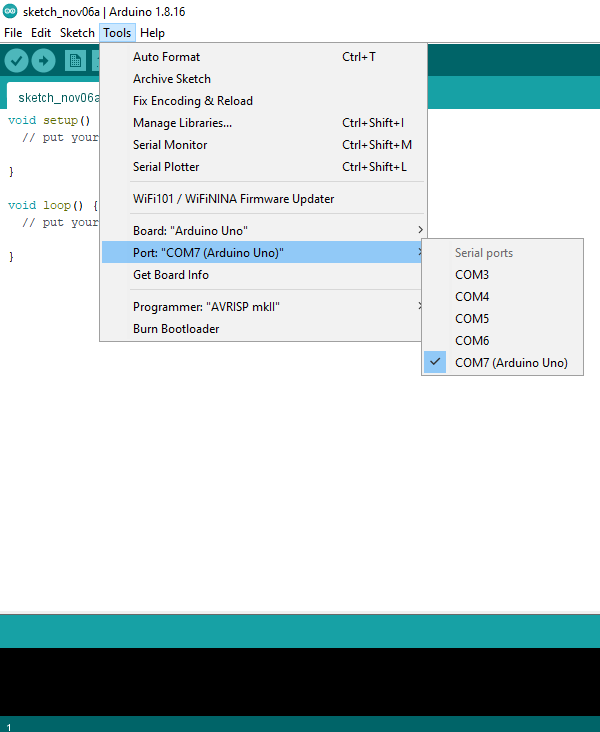
2. Drivers – Drivers provide a way for software on your computer (i.e. the Arduino software) to talk to the hardware you connect to your computer (the Arduino board). In the case of Arduino, the drivers work by providing a virtual serial port (or virtual COM port). If you are operating a Windows system, and your Arduino drivers are not up to date you will usually get Arduino ports not showing up. If this is the case, update using these steps below.
- Go to Start Menu, and type Device Manager on the search bar.

- Click the Device Manager icon to open a new window.
- Scroll down to Ports (COM & LPT) and click on to expand.
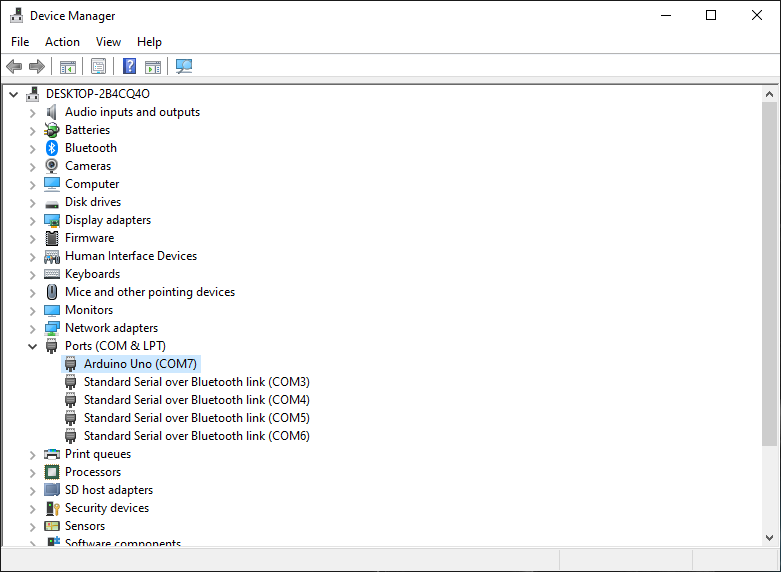
- Double-click the Arduino Uno device for the properties window to display.
- Select the Driver tab, and click Update Driver

- Choose the search automatically for the updated driver software option.

- Windows will begin to update.
- After the update is done, “Windows has successfully updated your driver software” will be displayed on your screen.
- Run a final check to be sure the driver was updated correctly.
3. Physical Connection
- First, make sure your board is on (the green LED is on) and connected to the computer.
- The Arduino Uno may have trouble connecting to Windows through a USB hub. If nothing appears in your “Tools > Serial Port” menu, try plugging the board directly into your computer and restarting the Arduino IDE.
- Disconnect digital pins 0 and 1 while uploading as they are shared with serial communication with the computer (they can be connected and used after the code has been uploaded).
- Try uploading with nothing connected to the board (apart from the USB cable).
- Make sure the board isn’t touching anything metallic or conductive.
- Try a different USB cable; sometimes they don’t work.
- If you have a board that doesn’t support auto-reset, be sure that you are resetting the board a couple of seconds before uploading using the reset button present in the Arduino UNO board.
- If you get this error: [VP 1] Device is not responding correctly. try uploading again (i.e., reset the board and press the download button a second time).
4. Bootloader – Make sure there’s a bootloader burned on your Arduino board. To check, reset the board. The built-in L LED (which is connected to pin 13) should blink. If it doesn’t, there may not be a bootloader on your board.
Now let’s discuss problems related to SMD-type Arduino UNO boards
1. Arduino is not detected by computer: – Sometimes your PC will not detect the Arduino board when it is connected through USB even in Device manager
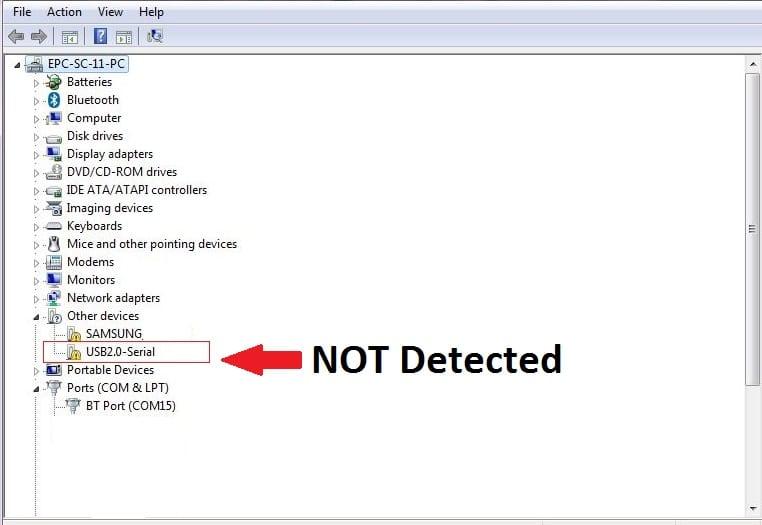
This problem might occur in SMD-type boards because of the difference in the USB to serial converter chip. This is called CH340G USB to serial converter chip.
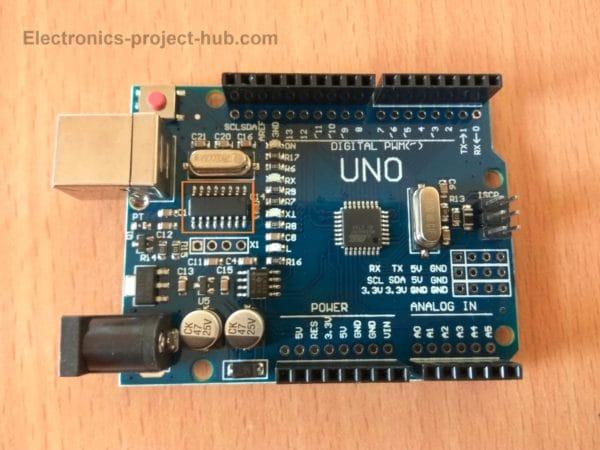
- In order to make your Arduino UNO detectable in such cases, you have to install the CH340G driver manually.
- After installation, restart your computer. (Important)
2. Incorrect COM port: – If your Arduino board has a CH340G chip, it won’t show you the connect COM port number and you have to try each of them that is displayed.
Apart from these problems, other problems with Arduino SMD type board will have the same solution as Arduino DIP type board, kindly refer to that section for any other problems.


